
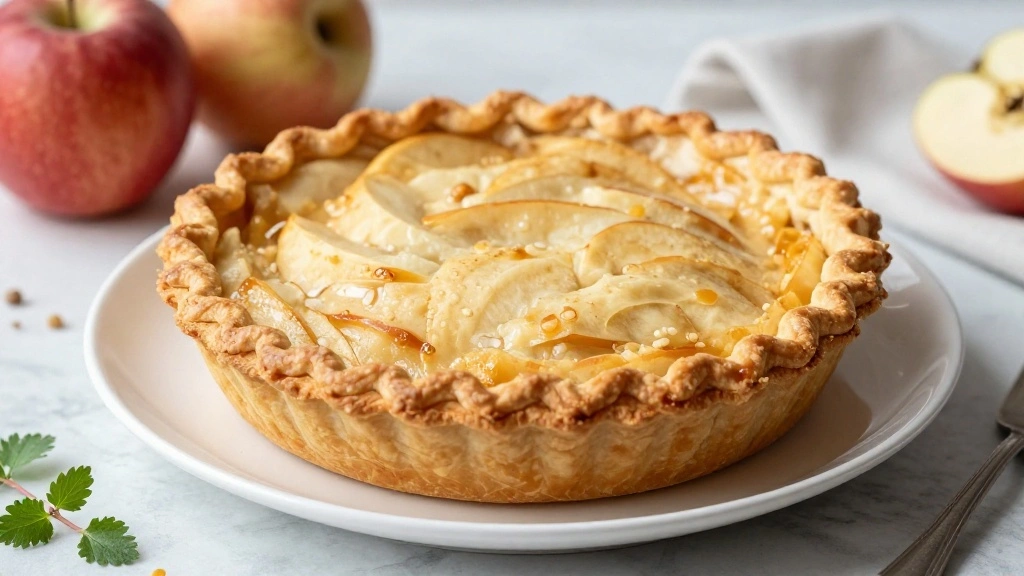
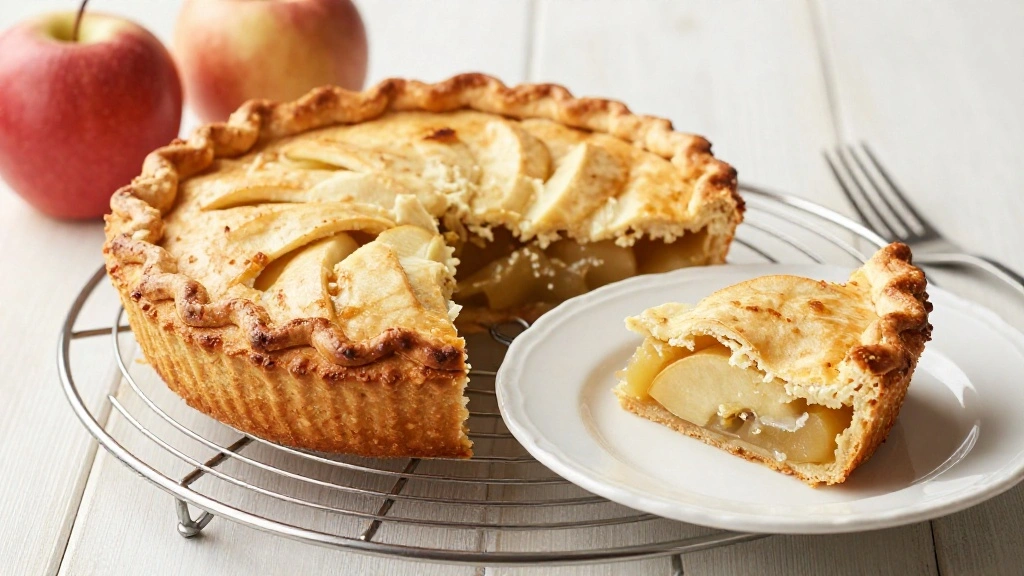
The aroma of a homemade apple pie baking in the oven is a sure sign that autumn has arrived.
With its flaky buttery crust and warm spiced apple filling, this pie is the epitome of comfort food.
Every bite is a perfect balance of sweetness and tartness, making it a timeless dessert loved by all.
I first learned this recipe from my grandmother, who believed that the secret to a great pie lies in the quality of its ingredients.
Whether it’s a holiday gathering or a simple family dinner, this apple pie will surely become a staple at your table.
The History and Cultural Significance
• Apple Pie Recipe traces its origins to medieval England, where it was originally created using apples and spices encased in a pastry shell.
• The dish evolved over decades as settlers brought it to America, where sugar became a key ingredient, eventually becoming the beloved version we know today.
• In American culture, this dish traditionally appears at Thanksgiving and Fourth of July celebrations, symbolizing comfort and home.
• While many variations exist across different regions, the authentic version maintains a flaky crust that sets it apart from imitations.


Recipe Overview
Nutritional Information (per serving)
Essential Equipment Guide
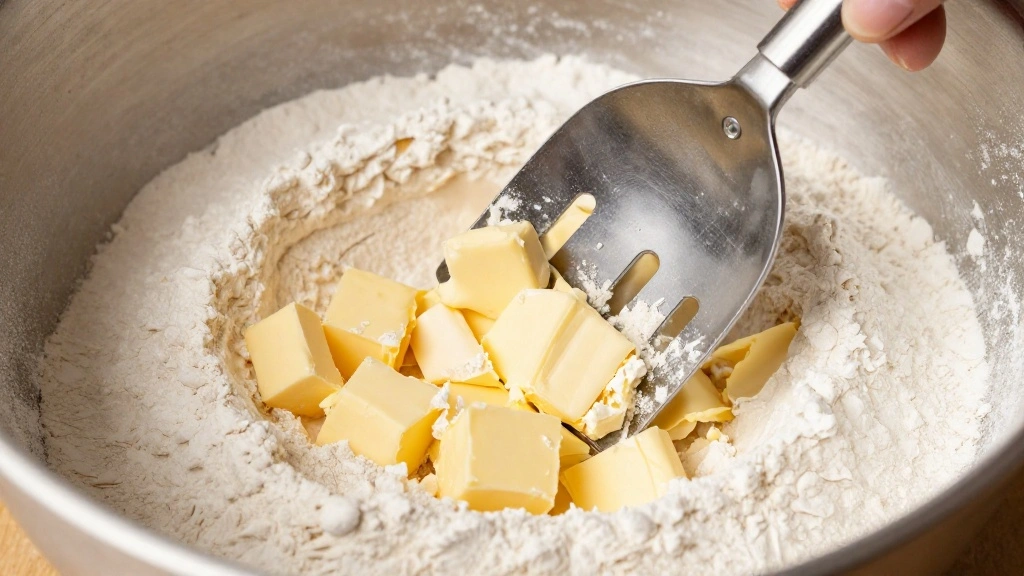
Pastry Blender: A pastry blender is crucial for cutting butter into the flour evenly, ensuring a flaky crust. Alternatives like two knives can work, but they require more effort and may not yield as consistent results.
Rolling Pin: A rolling pin evenly flattens the dough to the desired thickness. Look for a heavy, smooth one for the best control. A wine bottle can serve as a makeshift option if needed.
Pie Dish: A ceramic or glass pie dish helps distribute heat evenly for a well-baked crust. Avoid metal dishes, which can lead to uneven baking and an undercooked bottom.


Ingredients
For the Crust
|
| Amount | Ingredient | Notes |
|---|---|---|
| 2 cups | all-purpose flour | sifted for light texture |
| 1 teaspoon | salt | enhances flavor |
| 1 cup | unsalted butter | chilled and cubed |
| 1/4 cup | ice water | helps form the dough |
For the Filling
| Amount | Ingredient | Notes |
|---|---|---|
| 6 cups | apples | peeled, cored, and sliced |
| 3/4 cup | sugar | adds sweetness |
| 2 tablespoons | all-purpose flour | thickens the filling |
| 1 teaspoon | cinnamon | adds warmth |
| 1/4 teaspoon | nutmeg | adds depth |
| 1 tablespoon | lemon juice | enhances flavor |


Preparation Methods
Cutting in Butter: This technique involves combining butter with flour until the mixture resembles coarse crumbs. It is essential for creating a flaky crust as the small butter pieces melt during baking, leaving air pockets.
Blind Baking: Partially baking the crust before adding the filling helps prevent a soggy bottom. Use pie weights or dried beans to keep the crust from puffing up.
Apple Slicing: For uniform cooking, slice apples evenly. Use a mandoline or a sharp knife, aiming for slices about 1/4 inch thick.


Step 1: Prepare the Dough
In a large bowl, combine flour and salt.
Add cold butter cubes and use a pastry blender to cut the butter into the flour until it resembles coarse crumbs.
Gradually add ice water, mixing until the dough just comes together.
Form the dough into two discs, wrap in plastic wrap, and refrigerate for at least 30 minutes.


Step 2: Roll Out the Dough
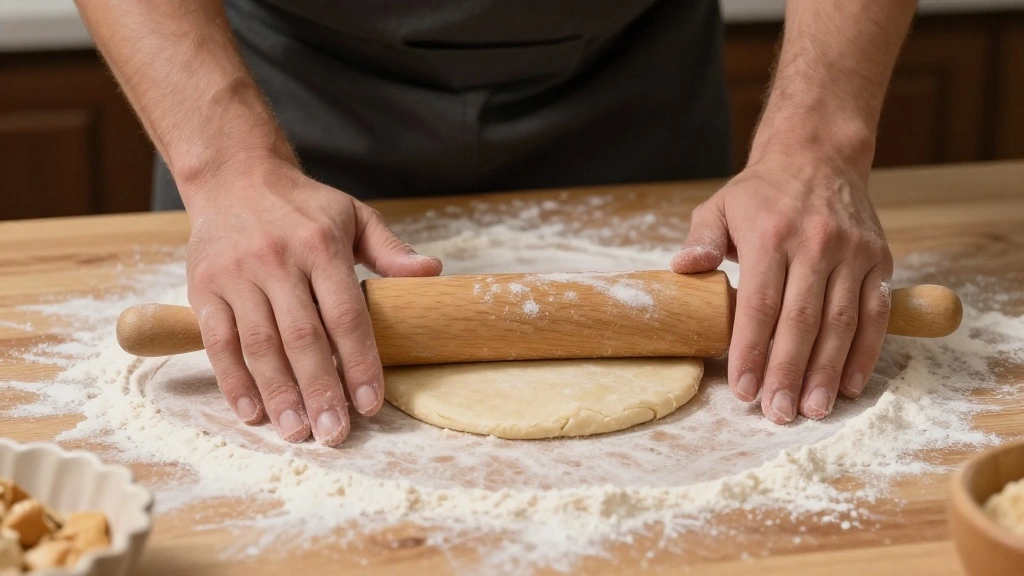
Remove one dough disc from the refrigerator and place it on a lightly floured surface.
Use a rolling pin to roll the dough into a circle about 12 inches in diameter.
Carefully transfer the dough to a pie dish, pressing it gently into the corners.
Trim any overhanging edges, leaving about a 1/2 inch overhang.
Step 3: Prepare the Filling
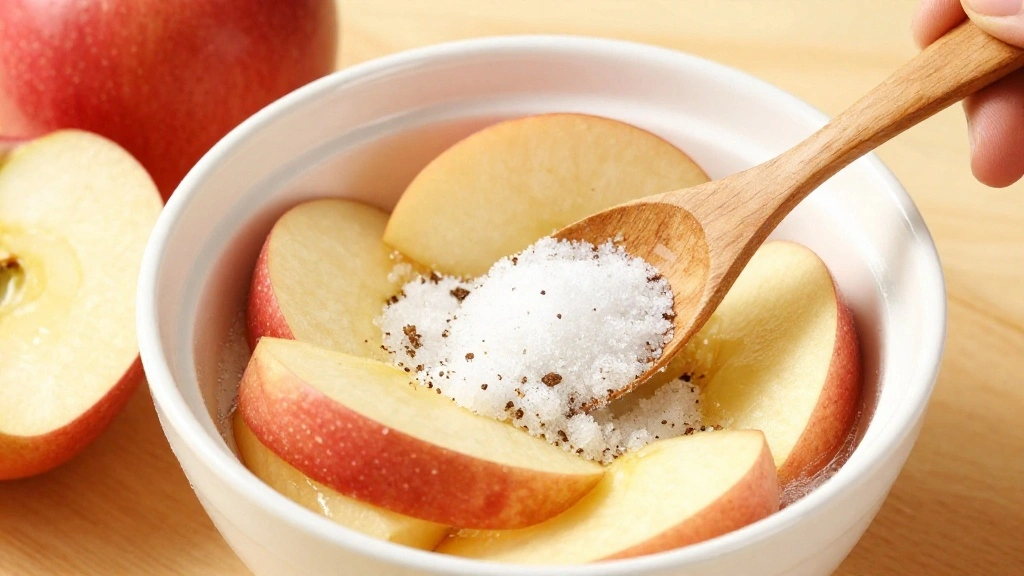
In a large bowl, combine sliced apples, sugar, flour, cinnamon, nutmeg, and lemon juice.
Toss the ingredients together until the apples are evenly coated.
Let the mixture sit for 10 minutes to allow the flavors to meld.
Stir the filling once more before using.
Step 4: Assemble the Pie
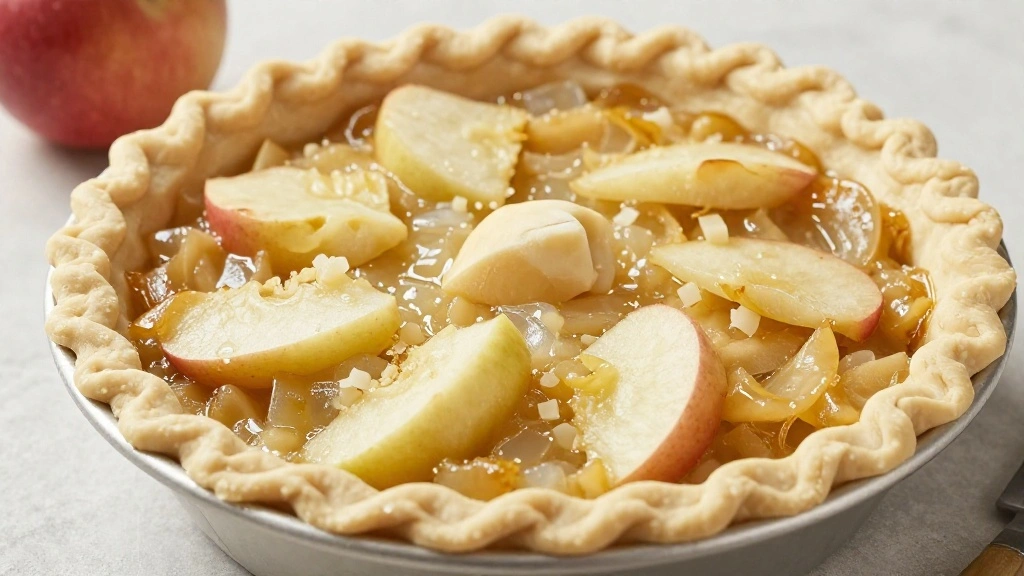
Pour the apple filling into the prepared pie crust, spreading it evenly.
Remove the second dough disc from the refrigerator and roll it out as before.
Place the rolled dough over the filling, trimming the edges as needed.
Crimp the edges of the top and bottom crusts together to seal.
Step 5: Create Ventilation Slits
Use a sharp knife to cut several slits in the top crust, allowing steam to escape during baking.
Make decorative shapes if desired, ensuring the cuts are evenly spaced.
Brush the top crust with a little milk or egg wash for a golden finish.
Sprinkle a little sugar over the top for extra sweetness and crunch.


Step 6: Preheat and Prepare for Baking
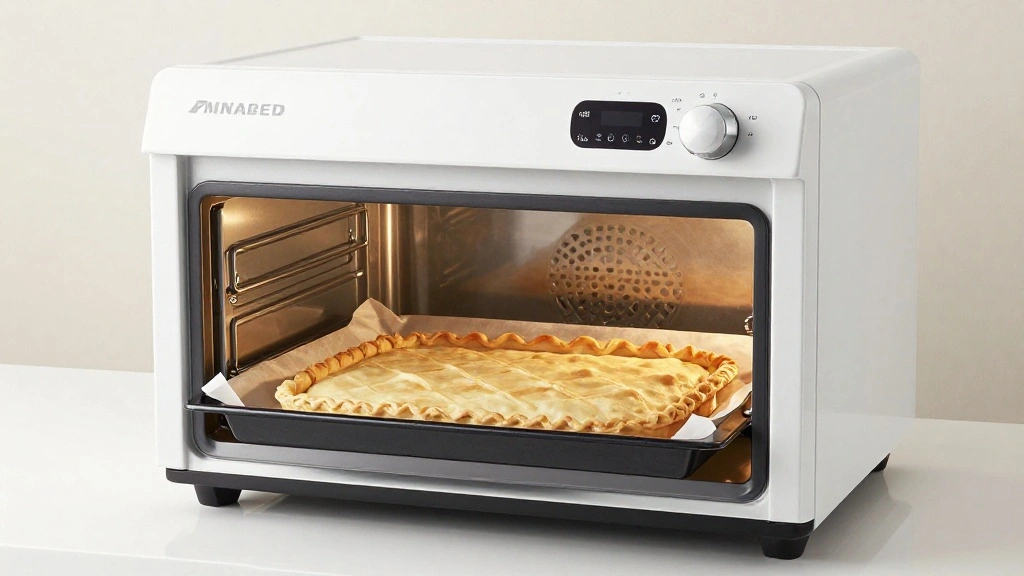
Preheat the oven to 425°F (220°C).
Place the pie on a baking sheet to catch any drips.
Position the baking sheet on the middle rack of the oven.
Prepare a sheet of foil to cover the crust edges if they brown too quickly.


Step 7: Bake the Pie
Bake the pie in the preheated oven for 20 minutes.
Reduce the oven temperature to 375°F (190°C) and continue baking for an additional 40 minutes.
Check the pie periodically, covering the edges with foil if they become too dark.
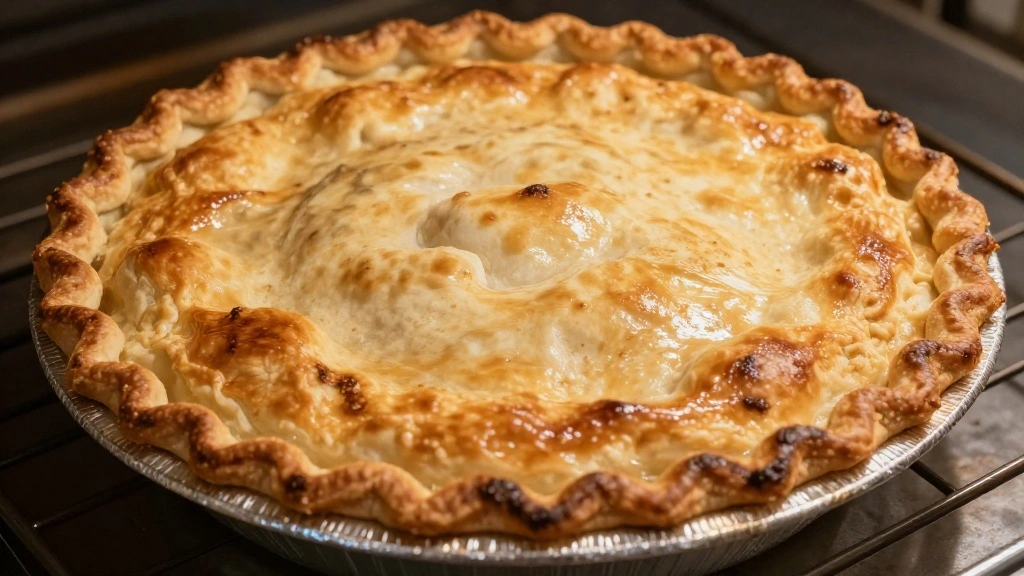
The pie is done when the apples are tender and the crust is golden brown.
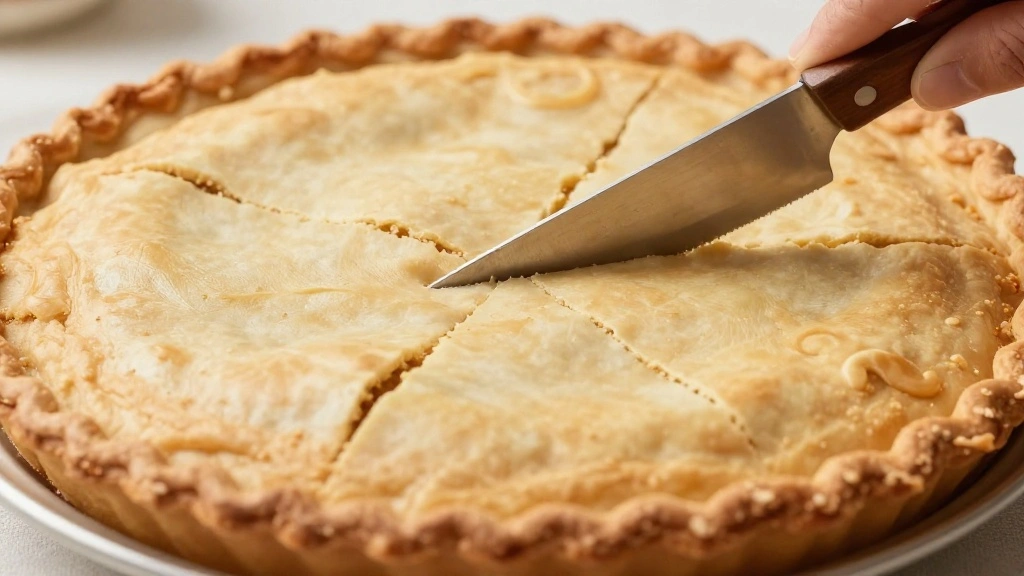
Step 8: Cool and Serve
Remove the pie from the oven and let it cool on a wire rack for at least 2 hours.
This cooling period allows the filling to set properly.
Slice the pie with a sharp knife, wiping the blade clean between cuts.
Serve warm or at room temperature, optionally with vanilla ice cream or whipped cream.


Critical Timing and Temperature Guide
Blind Baking: Preheat the oven to 375°F (190°C). Bake the crust for 10-12 minutes or until lightly golden. Ensure pie weights are evenly distributed to prevent puffing.
Baking the Pie: Start at 425°F (220°C) for 20 minutes, then reduce to 375°F (190°C) for 40 minutes. Look for bubbling filling and golden crust as indicators of doneness.
Cooling Time: Allow the pie to cool for at least 2 hours. Cutting too soon can result in a runny filling. Be patient for the best texture.
Pro Tips for Apple Pie Recipe
• Ingredient Selection: Choose tart apples like Granny Smith for a balance of sweet and tart flavors and crisp texture.
• Preparation Secret: Chill all your ingredients and tools, including the mixing bowl, to keep the butter from melting during dough preparation.
• Temperature Management: Ensure the dough remains cold throughout preparation to maintain flakiness.
• Texture Enhancement: Use a pastry blender to achieve the ideal crumbly texture in the dough.
• Flavor Layering: Add a pinch of salt to the filling to enhance the sweetness of the apples and the depth of the spices.
• Make-Ahead Strategies: Prepare the dough up to two days in advance and refrigerate, or freeze for up to a month.
• Restaurant-Quality Finishing Touches: Brush the top crust with an egg wash for a glossy finish.
• Equipment Optimization: Use a glass pie dish for even baking and to monitor the crust's browning.


Troubleshooting Common Issues
• Soggy Bottom Crust: This can occur if the filling is too wet. Blind bake the crust and ensure filling ingredients are well mixed before adding.
• Crust Too Hard: Overworking the dough can cause toughness. Handle the dough gently and refrigerate as needed to keep it cool.
• Filling Too Runny: This may happen if the apples release too much juice. Use flour or cornstarch to thicken the filling.
• Crust Burns Before Filling Cooks: Cover the edges with foil or a pie shield once they reach the desired color.
• Unevenly Cooked Apples: Slice apples uniformly and avoid over-packing the pie, which can prevent even cooking.
Variations and Regional Differences
• French Tarte Tatin: An upside-down caramelized apple tart made with puff pastry instead of a traditional pie crust, popular in France.
• Dutch Apple Pie: Features a crumbly streusel topping instead of a top crust, offering a different texture and flavor profile.
• Swedish Äppelpaj: A simple apple pie with a cookie-like crust and often includes cardamom in the filling, adding a unique spice note.
• New England Apple Pie: Sometimes includes cheddar cheese in the crust or served alongside, offering a savory contrast to the sweet apples.
Food Science Behind the Recipe
• Gluten Development: Mixing flour and water forms gluten, which gives structure to the dough. Overmixing can lead to toughness, so handle gently.
• Butter Melting: Cold butter creates steam pockets during baking, leading to a flaky crust. Keeping the butter cold is essential for this process.
• Chemical Changes in Apples: Cooking apples breaks down pectin, a natural thickener, which helps set the filling as it cools.
Frequently Asked Questions
What's the most common mistake people make when preparing Apple Pie? Overworking the dough, which leads to a tough crust, is a frequent issue. Handle the dough minimally to avoid this.
How can I ensure my pie crust stays flaky? Keep the ingredients and equipment cold, and avoid overmixing the dough.
Can I use different types of apples in my pie? Yes, combining different apple varieties can enhance flavor complexity and texture.
Is it necessary to peel the apples? Peeling is recommended for a smoother texture, but leaving the skins on can add color and nutrients.
How do I store leftover apple pie? Cover and refrigerate the pie for up to four days, or freeze for longer storage.
Can I make the pie in advance? Yes, bake the pie a day ahead and reheat in a low oven before serving.
What should I do if my pie filling is too watery? Let the filling rest before baking to allow juices to thicken, or add more thickener like flour or cornstarch.
Serving and Presentation Guide
• Traditional Presentation: Serve warm with a scoop of vanilla ice cream for a classic pairing.
• Modern Twist: Garnish with a caramel drizzle and a sprinkle of sea salt for added flavor complexity.
• Elegant Plating: Use a dollop of whipped cream and a sprig of mint for a professional touch.
• Family Style: Serve directly from the pie dish at the table for a cozy, communal feel.
Conclusion
This homemade apple pie recipe with a flaky buttery crust is a celebration of simplicity and flavor.
Its classic appeal and comforting taste make it a favorite in any season.
Try this recipe, and you'll find yourself returning to it time and again.
Share it with loved ones and enjoy the joyful moments it brings.