
Slow Cooker Recipes: Easy Meals, Less Effort!
Family-friendly dishes for busy people — quick prep, delicious results.
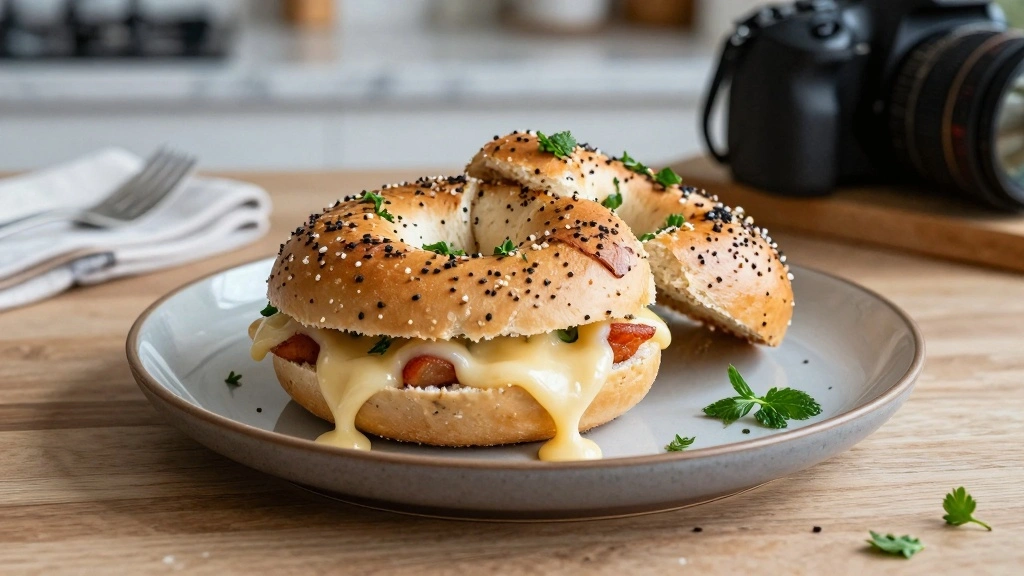
Grab yours for $4There is something undeniably comforting about the combination of warm, freshly baked bread and gooey, melted cheese.
Deliciously Cheesy Stuffed Bagels bring this combination to life, offering a delightful twist on the classic bagel that is sure to impress.
I stumbled upon the idea for this recipe during a chilly autumn morning, when the craving for something warm and cheesy was irresistible.
The rich cheese filling complements the perfectly baked bagel to create a harmony of textures and flavors.
Whether you’re enjoying these as a breakfast treat or a satisfying snack, they deliver a level of indulgence that is hard to resist.
Prepare to be amazed by how simple ingredients can transform into such a delectable creation.
The History and Cultural Significance
• Deliciously Cheesy Stuffed Bagels trace their origins to Eastern European Jewish communities, where bagels were a staple food item in the 17th century.
• The dish evolved over decades as cheese became more commonly available, eventually inspiring variations filled with different types of cheese and spices.
• In Jewish culture, bagels often appear at celebrations and gatherings, symbolizing the cycle of life with their round shape.
• While many variations exist across different regions, the authentic version maintains a chewy dough and a rich cheese filling that sets it apart from imitations.
Recipe Overview
Nutritional Information


Essential Equipment Guide
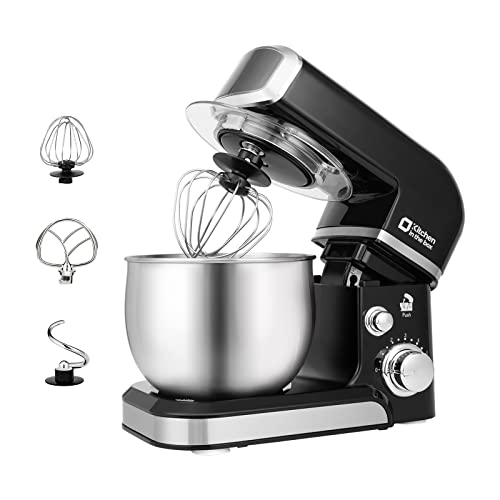
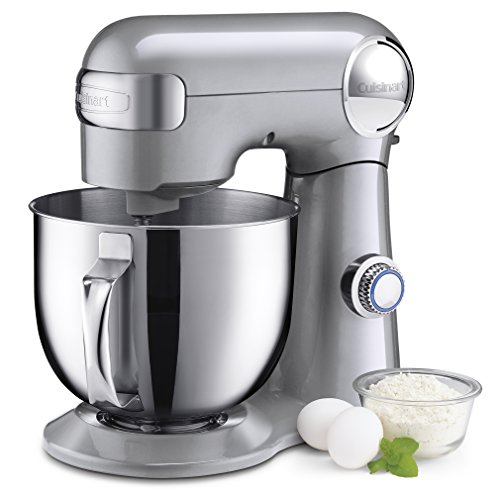
Stand Mixer: A stand mixer with a dough hook is essential for creating the perfect bagel dough. It allows for thorough kneading, which is crucial for developing gluten and achieving the characteristic chewy texture. A hand mixer won’t have the same power, but kneading by hand can be an alternative if done with patience.
Baking Sheet: A heavy-duty baking sheet ensures even baking and helps achieve a golden crust. Look for one with a non-stick surface or use parchment paper to prevent sticking.
Rolling Pin: A rolling pin is necessary for evenly flattening the dough before stuffing. Opt for a wooden or silicone pin for better control and ease of cleaning.

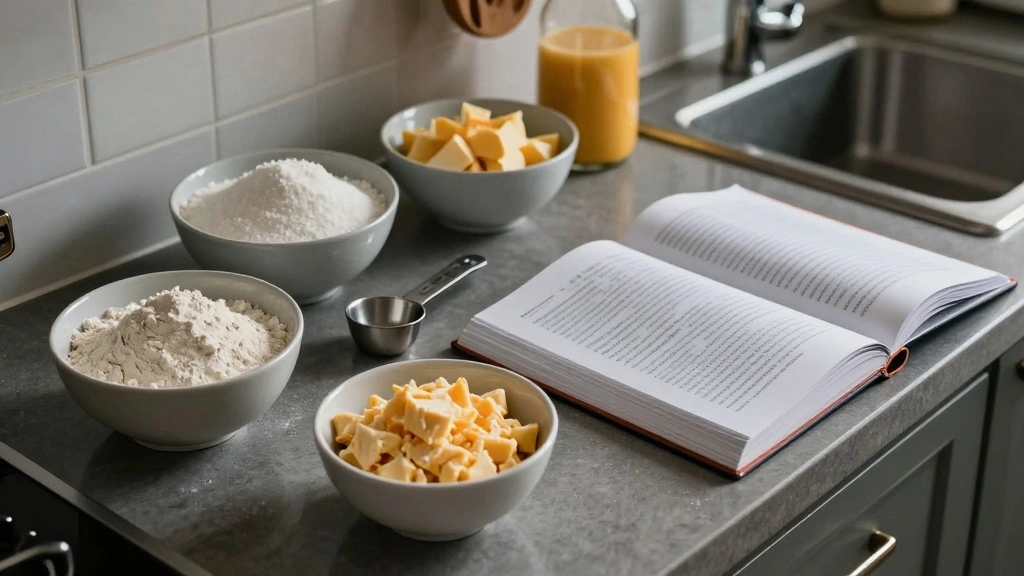
Ingredients
For the Dough
|
| Amount | Ingredient | Notes |
|---|---|---|
| 3 cups | all-purpose flour | sifted for light texture |
| 1 tablespoon | sugar | enhances flavor |
| 2 teaspoons | instant yeast | for leavening |
| 1 teaspoon | salt | balances sweetness |
| 1 cup | warm water | activates yeast |
For the Filling
| Amount | Ingredient | Notes |
|---|---|---|
| 1 1/2 cups | shredded mozzarella cheese | melted texture |
| 1/2 cup | cream cheese | adds richness |
| 1 teaspoon | garlic powder | for flavor |
| 1 teaspoon | dried oregano | adds aroma |


Preparation Methods
Kneading Dough: Kneading is crucial for developing the gluten network that gives bagels their signature chew. Ensure the dough is smooth and elastic by kneading for about 10 minutes using a stand mixer or by hand.
Rolling and Shaping: Proper rolling and shaping of the dough affects the final texture. Roll the dough evenly to prevent uneven baking and ensure the filling is well-distributed.
Stuffing the Bagels: Stuffing requires precision to maintain the structural integrity of the bagel while ensuring an even distribution of cheese. Seal the edges well to prevent the filling from leaking during baking.
Step 1: Prepare Ingredients
Gather all ingredients and ensure they are measured accurately.
Allow the cream cheese to soften at room temperature for easier mixing.
Preheat your oven to 375°F (190°C) to have it ready for baking.
Prepare a baking sheet with parchment paper to prevent sticking.


Step 2: Make the Dough
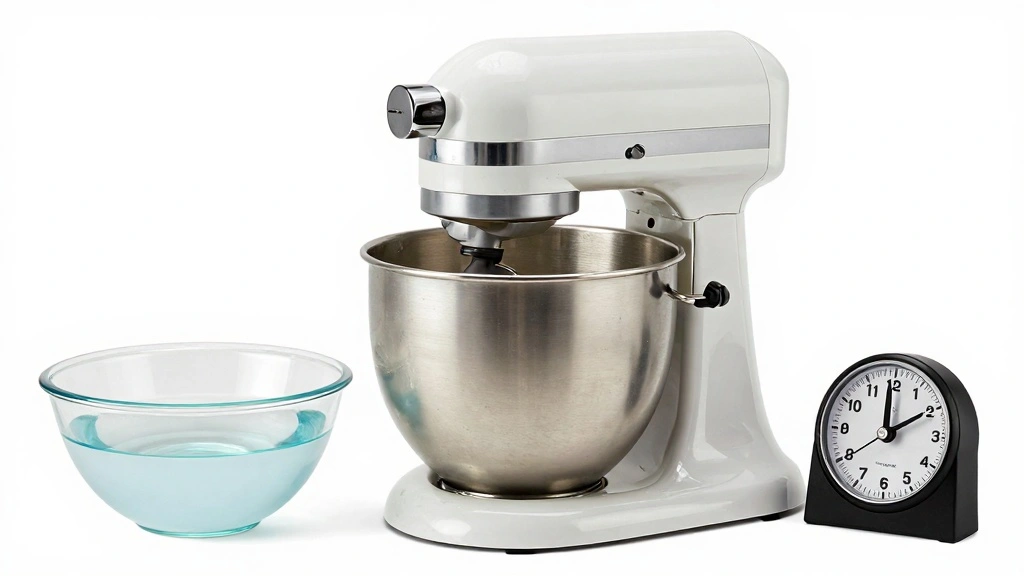
In a stand mixer, combine flour, sugar, yeast, and salt.
Gradually add warm water with the mixer on low speed.
Increase speed to medium and knead until the dough is smooth and elastic.
Cover the bowl with a damp cloth and let it rest for 10 minutes.


Step 3: Prepare the Filling

In a medium bowl, mix shredded mozzarella, softened cream cheese, garlic powder, and oregano.
Ensure the ingredients are well combined for a uniform filling.
Taste to adjust seasonings if necessary.
Set aside until ready to use.


Step 4: Roll Out the Dough
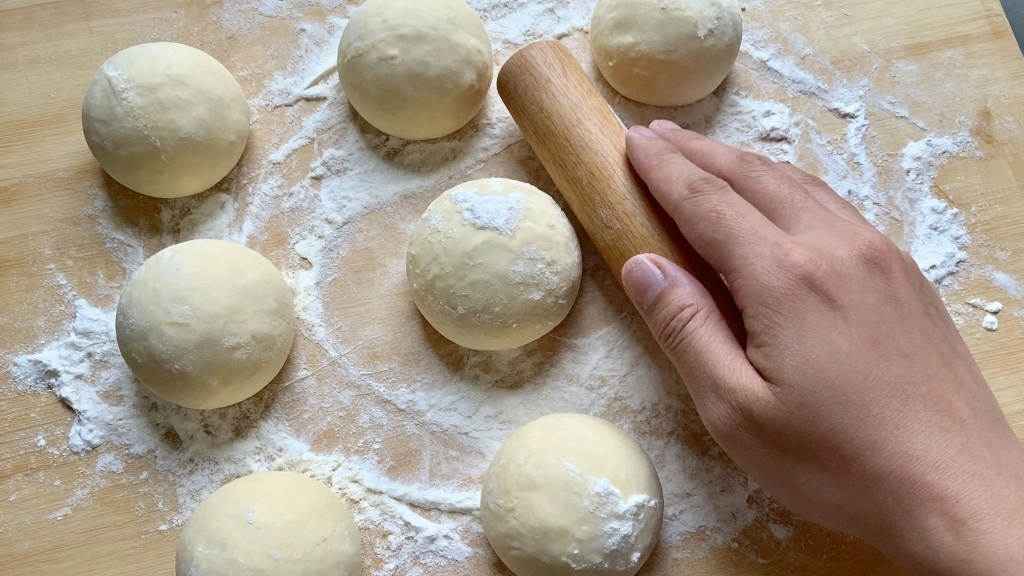
Divide the dough into 8 equal pieces and roll each into a ball.
Using a rolling pin, flatten each ball into a disk about 5 inches in diameter.
Ensure even thickness to avoid uneven baking.
Dust with flour as needed to prevent sticking.
Step 5: Stuff the Bagels
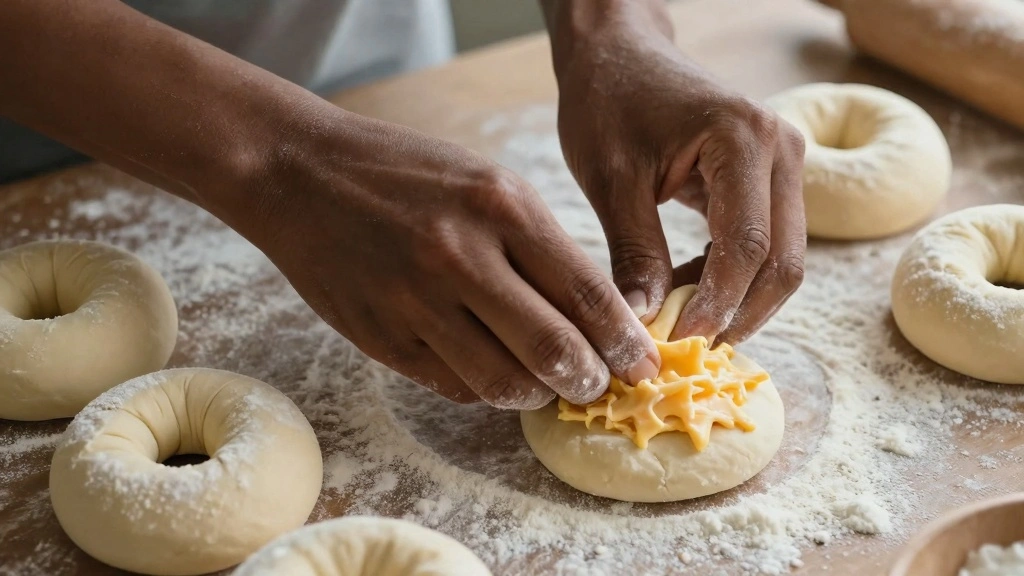
Place a generous tablespoon of cheese filling in the center of each dough disk.
Bring the edges of the dough up and over the filling to encase it completely.
Pinch the seams tightly to seal.
Roll gently to smooth out the surface.
Step 6: Shape and Rest
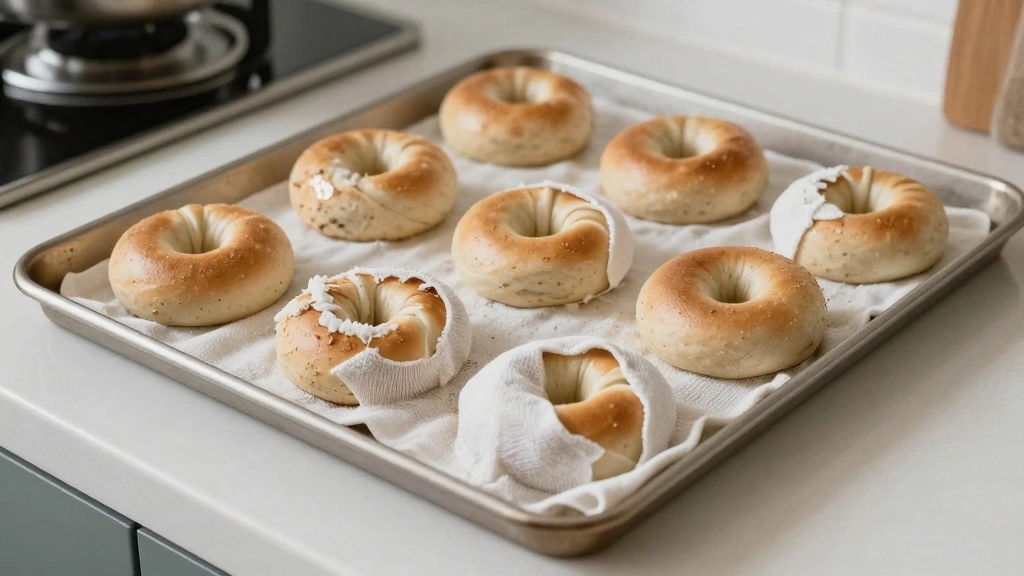
Form each stuffed dough piece into a round bagel shape.
Place on the prepared baking sheet, leaving space between each bagel.
Cover with a damp cloth and let rest for 15 minutes.
This allows the dough to relax and rise slightly.
Step 7: Bake the Bagels
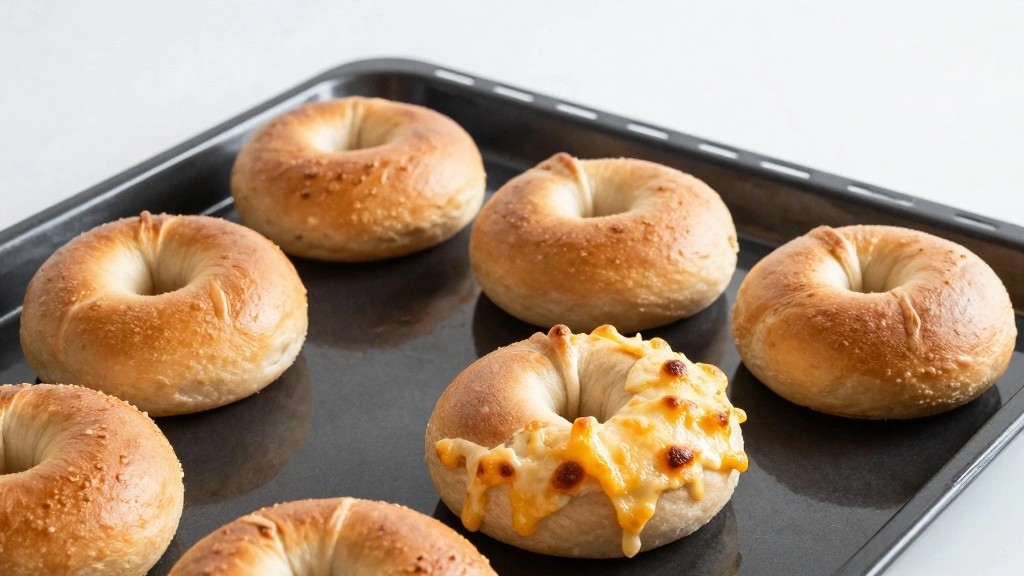
Place the baking sheet in the preheated oven.
Bake for 20-25 minutes until the bagels are golden brown.
Check halfway through to ensure even browning.
Remove from oven and let cool slightly before serving.
Step 8: Serve and Enjoy
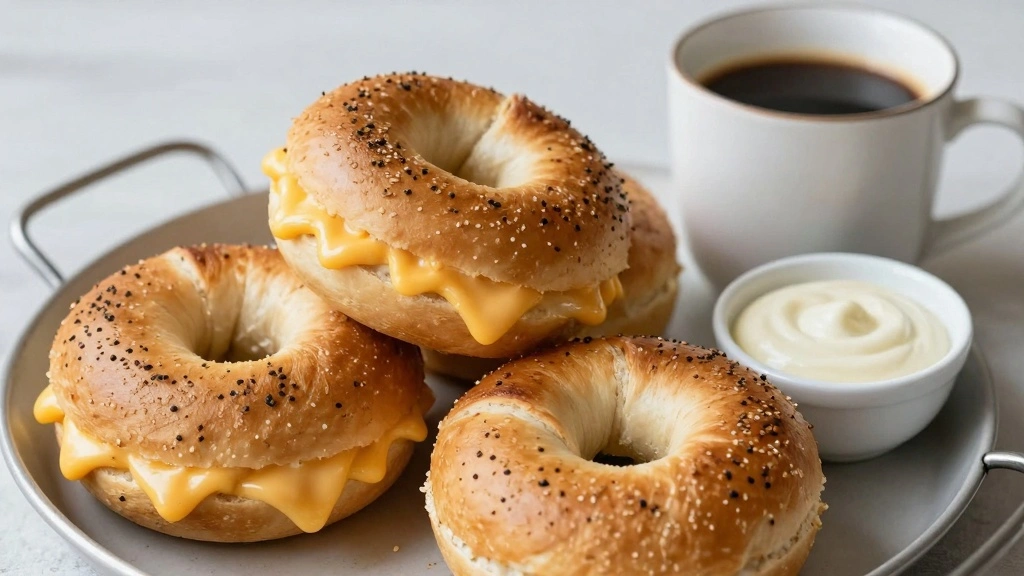
Carefully transfer the bagels to a cooling rack.
Allow them to cool for a few minutes to set the cheese filling.
Serve warm for the best texture and flavor.
Enjoy with your favorite beverage or as a part of a hearty breakfast.
Critical Timing and Temperature Guide
Dough Resting: Rest the dough for 10-15 minutes after mixing. The dough should appear slightly puffy, indicating yeast activity. Avoid over-resting as it can lead to over-proofing.
Baking Temperature: Bake at 375°F (190°C) to ensure even cooking and a golden crust. Too high a temperature may cause the exterior to burn while the inside remains undercooked.
Cooling Time: Allow bagels to cool for at least 5 minutes to let the cheese filling set. Cutting too soon can result in a mess as the cheese may still be too runny.
Pro Tips for Deliciously Cheesy Stuffed
• Ingredient Selection: Choose high-quality mozzarella and cream cheese for a rich and flavorful filling. Freshness directly impacts the taste and texture.
• Preparation Secret: Briefly chilling the cheese filling makes it easier to handle and stuff into the dough, reducing mess and ensuring even distribution.
• Temperature Management: Use room temperature water to activate yeast without killing it. Ensure it’s warm, not hot.
• Texture Enhancement: Knead dough until it’s smooth and elastic for the perfect chewy texture. Under-kneaded dough results in dense bagels.
• Flavor Layering: Add herbs like oregano directly into the filling to infuse each bite with flavor rather than just seasoning the exterior.
• Make-Ahead Strategies: Prepare the dough a day in advance and refrigerate overnight. Bring to room temperature before shaping for added convenience and flavor development.
• Restaurant-Quality Finishing Touches: Brush the tops with melted butter or egg wash before baking to enhance color and add a glossy finish.
• Equipment Optimization: If you lack a stand mixer, kneading by hand is effective if done thoroughly. Incorporate a bench scraper for easier handling.


Troubleshooting Common Issues
• Dense Texture: Over or under-kneading the dough often causes density. Ensure proper kneading time and check dough elasticity by stretching a small piece to form a thin membrane.
• Cheese Leakage: Poor sealing of the dough edges can lead to filling leakage. Ensure edges are tightly pinched and sealed before baking.
• Uneven Browning: This can occur due to uneven oven heat or improper placement. Rotate the baking sheet halfway through for even exposure.
• Flat Bagels: Over-proofing the dough can cause it to collapse. Monitor proofing times closely and ensure the dough remains slightly firm.
• Soggy Bottoms: Under-baking or excess moisture can result in sogginess. Ensure the baking sheet is properly preheated and avoid overfilling with cheese.
• Dry Filling: Using low-fat cheese options can lead to a dry filling. Opt for full-fat versions for the best gooey texture.
Variations and Regional Differences
• New York Style: Focuses on a denser, chewier dough with a simple cream cheese filling, often enjoyed plain or with lox.
• Chicago Style: Features a thicker dough and incorporates spices like poppy seeds and onions into the topping.
• Italian Inspired: Uses a blend of mozzarella and parmesan with Italian herbs, offering a pizza-like flavor profile.
• Sweet Variations: Incorporate fillings like sweetened cream cheese and berries for a dessert-like twist.


Food Science Behind the Recipe
• Gluten Development: Kneading develops gluten, which gives the dough its elasticity and structure, crucial for the characteristic chewiness of bagels.
• Yeast Fermentation: Yeast consumes sugars, producing carbon dioxide that helps the dough rise and create air pockets, contributing to the texture.
• Maillard Reaction: Occurs during baking, responsible for the golden-brown crust, enhancing both flavor and appearance.
Frequently Asked Questions
What's the most common mistake people make when preparing Deliciously Cheesy Stuffed Bagels? Over or under-kneading the dough is a frequent issue, leading to improper texture. Ensure dough is kneaded until smooth and elastic.
Can I use different cheeses for the filling? Absolutely! Experiment with cheeses like cheddar or gouda for varied flavors, but ensure they melt well and complement the bagel dough.
How do I store leftover bagels? Store in an airtight container at room temperature for up to two days, or freeze for longer storage. Reheat before serving for the best texture.
What's the best way to reheat stuffed bagels? Reheat in an oven at 350°F (175°C) for 10 minutes to restore freshness and avoid sogginess from microwaving.
Can I make the dough without a stand mixer? Yes, kneading by hand is effective if done thoroughly. It may take longer, but the results are equally satisfying.
How do I prevent cheese from leaking during baking? Ensure the edges of the dough are well-sealed and avoid overfilling to keep the cheese contained.
Why are my bagels not browning evenly? Uneven oven heat can cause this. Rotate the baking sheet halfway through to ensure even exposure to heat.
Serving and Presentation Guide
• Traditional Presentation: Serve bagels warm on a wooden board with a small bowl of cream cheese or dipping sauce on the side.
• Modern Twist: Pair with a mixed green salad and a glass of white wine for a light, sophisticated meal.
• Brunch Platter: Arrange with fresh fruits, nuts, and spreads for an inviting brunch display.
• Party Appetizer: Cut into halves or quarters and serve with a variety of dipping sauces for a crowd-pleasing appetizer.
Conclusion
Deliciously Cheesy Stuffed Bagels offer a warm, comforting bite that brings together the best of cheese and bread.
With this recipe, you can create a delightful treat that is sure to impress family and friends alike.
Give this recipe a try and experience the joy of homemade bagels with a cheesy twist.
The satisfaction of biting into a fresh, warm, and flavorful bagel is one you'll want to savor again and again.