
Slow Cooker Recipes: Easy Meals, Less Effort!
Family-friendly dishes for busy people — quick prep, delicious results.
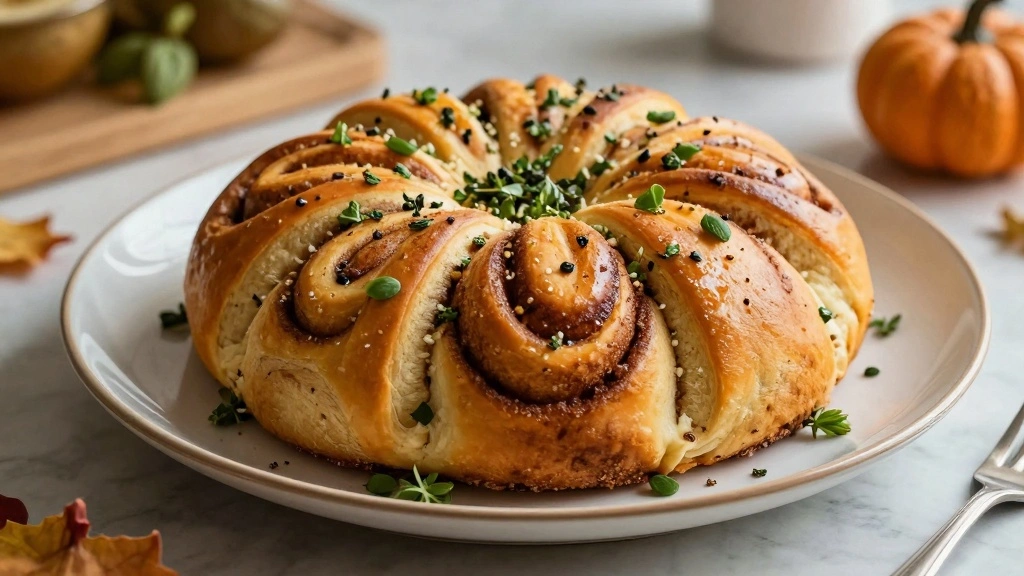
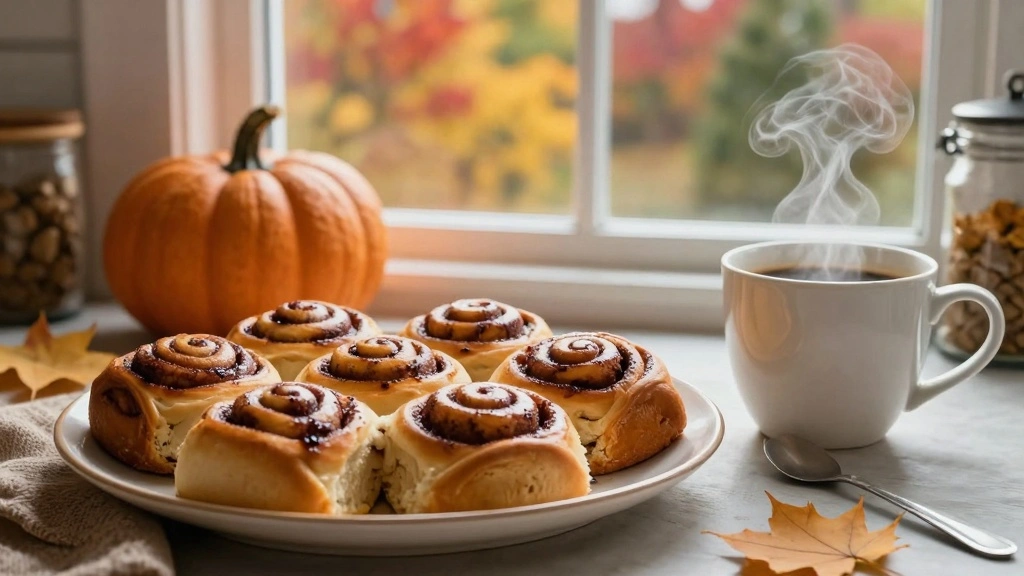
Grab yours for $4As the leaves turn and the air turns crisp, there’s nothing quite like the aroma of cinnamon rolls filling your home.
These Pumpkin Shaped Cinnamon Rolls are not only adorable but also capture the essence of fall with their warm spices and soft, fluffy texture.
Inspired by the charming pumpkins of the season, these rolls are perfect for adding a festive touch to your autumn gatherings.
The combination of cinnamon, nutmeg, and a hint of pumpkin makes for a delicious treat that’s both comforting and visually delightful.
Whether you’re hosting a brunch or simply indulging in a cozy weekend breakfast, these cinnamon rolls are sure to impress and satisfy.
Join me as we explore how to create these delightful pumpkin-shaped rolls step by step.
The History and Cultural Significance
• Pumpkin Shaped Cinnamon traces its origins to Northern Europe, where it was originally created by bakers looking to celebrate the fall harvest.
• The dish evolved over decades as spices from the East were introduced, eventually becoming the beloved version we know today.
• In many Western cultures, this dish traditionally appears at Thanksgiving and Halloween celebrations, symbolizing abundance and warmth.
• While many variations exist across different regions, the authentic version maintains a soft, pillowy texture that sets it apart from imitations.
Recipe Overview
Nutritional Information (per serving)


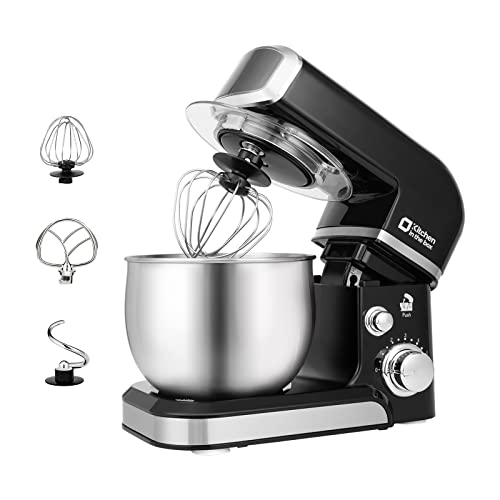
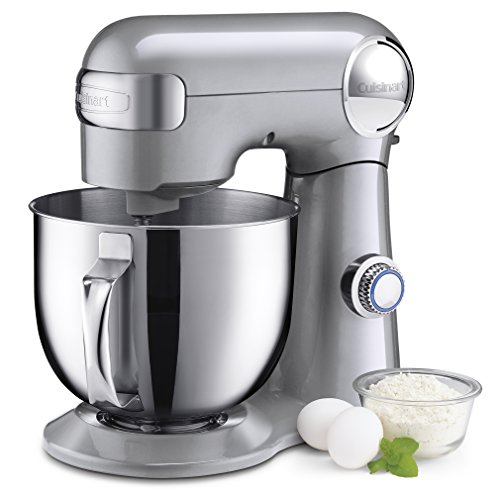
Essential Equipment Guide
Stand Mixer: Using a stand mixer ensures that the dough is kneaded evenly and thoroughly, which is crucial for achieving the perfect texture. A hand mixer or manual kneading can work as alternatives, but a stand mixer with a dough hook attachment is ideal.
Rolling Pin: A good rolling pin helps achieve the right thickness for your dough, which is essential for shaping the rolls. Look for a rolling pin that’s heavy enough to roll out dough evenly without sticking.
Baking Sheet: A high-quality baking sheet helps ensure even baking and prevents the bottoms of the rolls from over-browning. Opt for a heavy-duty, non-stick baking sheet or line a regular one with parchment paper to prevent sticking.

Ingredients
For the Dough
|
| Amount | Ingredient | Notes |
|---|---|---|
| 3 cups | all-purpose flour | provides structure |
| 1 packet | instant yeast | helps dough rise |
| 1/4 cup | granulated sugar | adds sweetness |
| 1/2 teaspoon | salt | enhances flavor |
| 1 cup | warm milk | activates yeast |
| 1/4 cup | unsalted butter | softened, adds richness |
| 1 large | egg | binds ingredients |
For the Filling
| Amount | Ingredient | Notes |
|---|---|---|
| 1/2 cup | brown sugar | adds caramel notes |
| 2 tablespoons | ground cinnamon | provides warmth |
| 1/4 teaspoon | nutmeg | adds depth |
| 1/4 cup | unsalted butter | melted, for spreading |
For the Glaze
| Amount | Ingredient | Notes |
|---|---|---|
| 1 cup | powdered sugar | for sweetness |
| 2 tablespoons | milk | adjusts consistency |
| 1 teaspoon | vanilla extract | adds aroma |


Preparation Methods
Kneading the Dough: Proper kneading is essential for developing gluten, which gives the rolls their structure and chew. Use the stand mixer on medium speed for about 5-7 minutes until the dough is smooth and elastic. If kneading by hand, use the heel of your hand to push the dough away from you, then fold it back over itself.
Shaping the Rolls: Rolling the dough evenly ensures that the rolls bake uniformly. Roll the dough into a rectangle, spread the filling evenly, then roll it up tightly to create a log. Use a sharp knife to cut the log into individual rolls.
Baking and Cooling: Proper baking ensures that the rolls are cooked through and have a soft, pillowy texture. Bake in a preheated oven at 350°F (175°C) for 20-25 minutes. Let the rolls cool slightly before glazing to prevent the glaze from melting off.


Step 1: Prepare the Dough
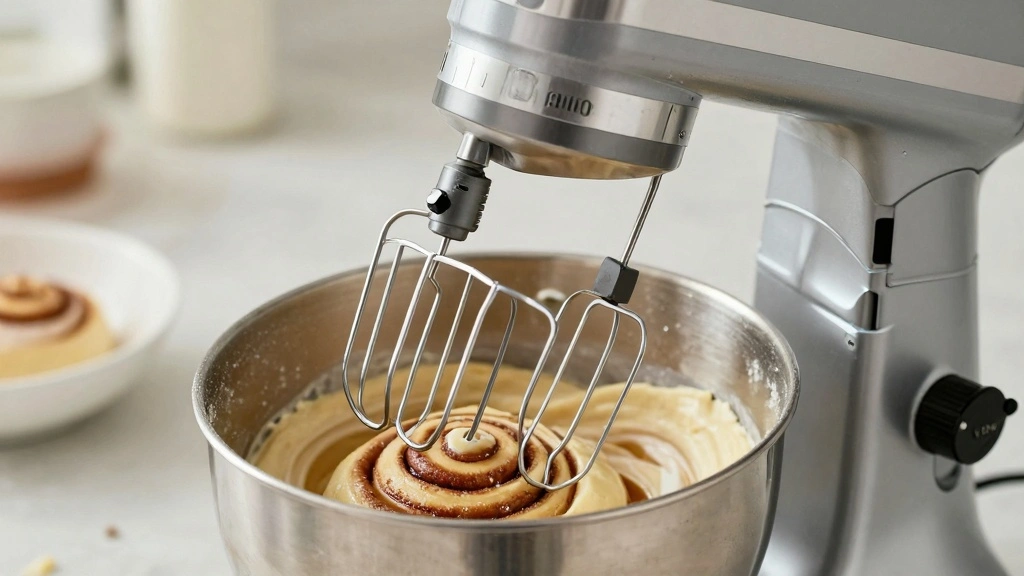
In a stand mixer bowl, combine flour, yeast, sugar, and salt.
Attach the dough hook and mix on low speed.
Gradually add warm milk, softened butter, and egg.
Increase speed to medium and knead until dough is smooth and elastic.


Step 2: Let the Dough Rise
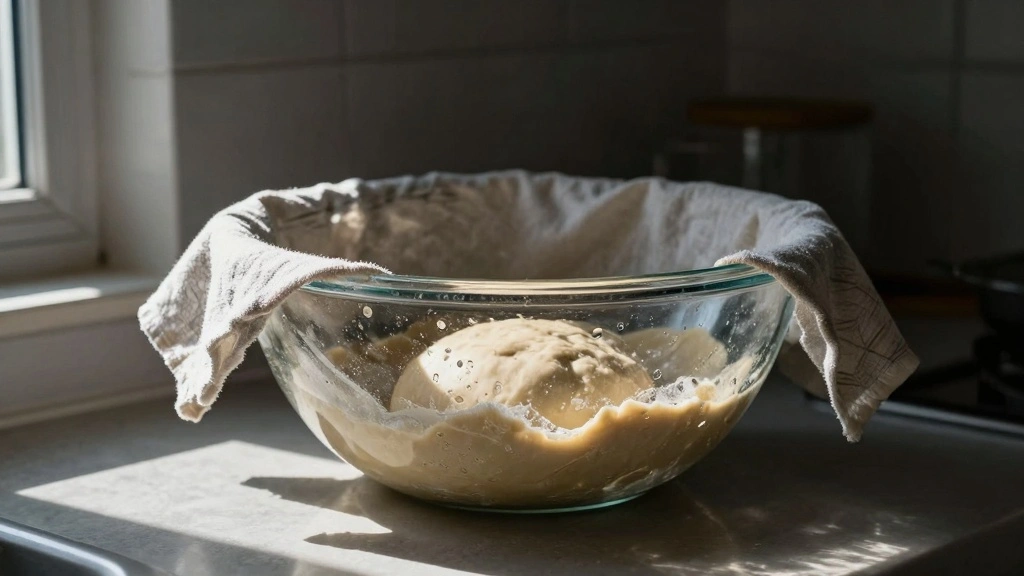
Transfer the dough to a lightly greased bowl.
Cover with a damp cloth and let rise in a warm place for 1 hour.
The dough should double in size.
Ensure the room temperature is warm enough to facilitate rising.
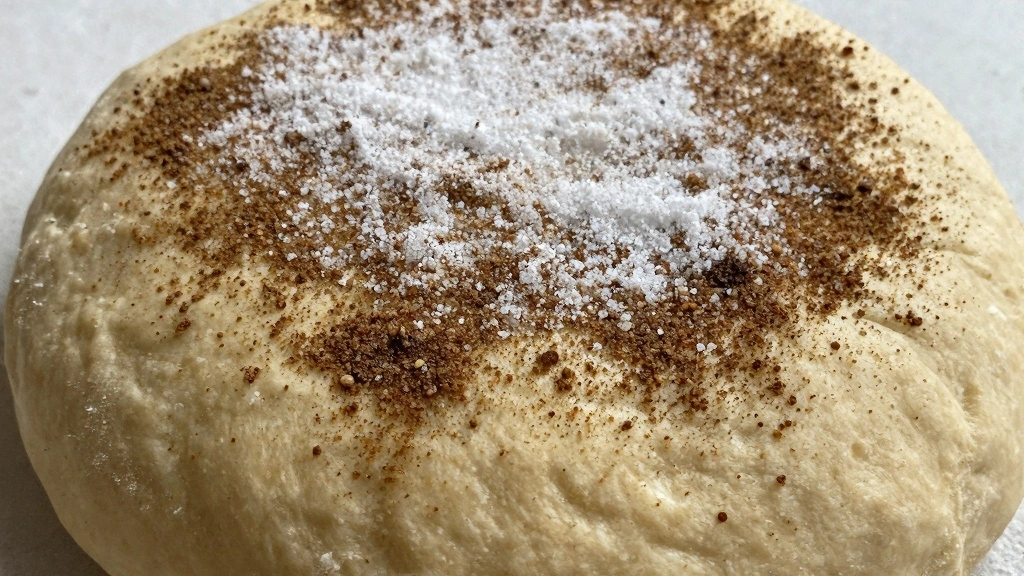
Step 3: Prepare the Filling
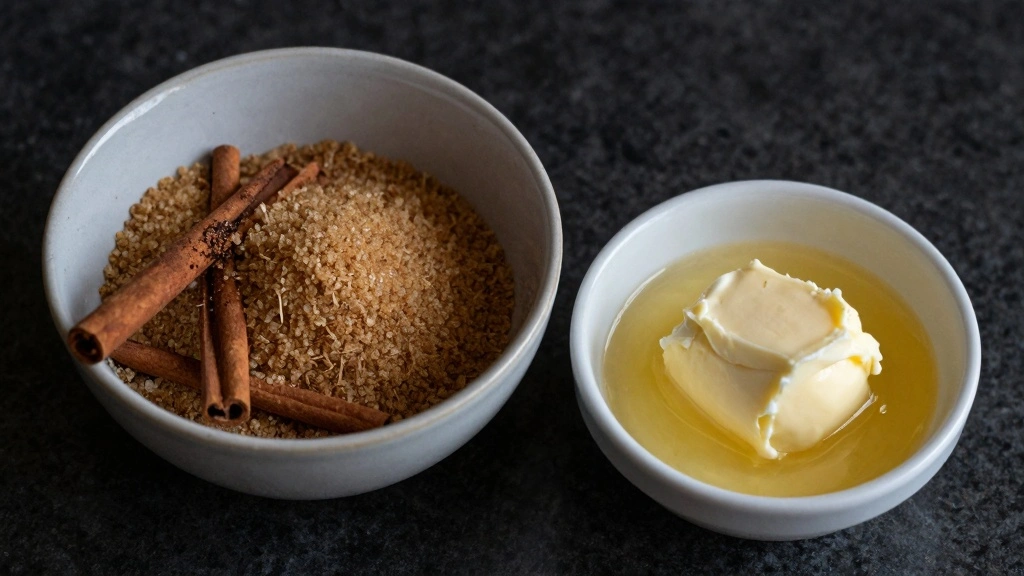
In a small bowl, mix brown sugar, cinnamon, and nutmeg.
Melt butter in a separate bowl.
Set both aside for later use.
Ensure the butter is fully melted for easy spreading.
Step 4: Roll Out the Dough
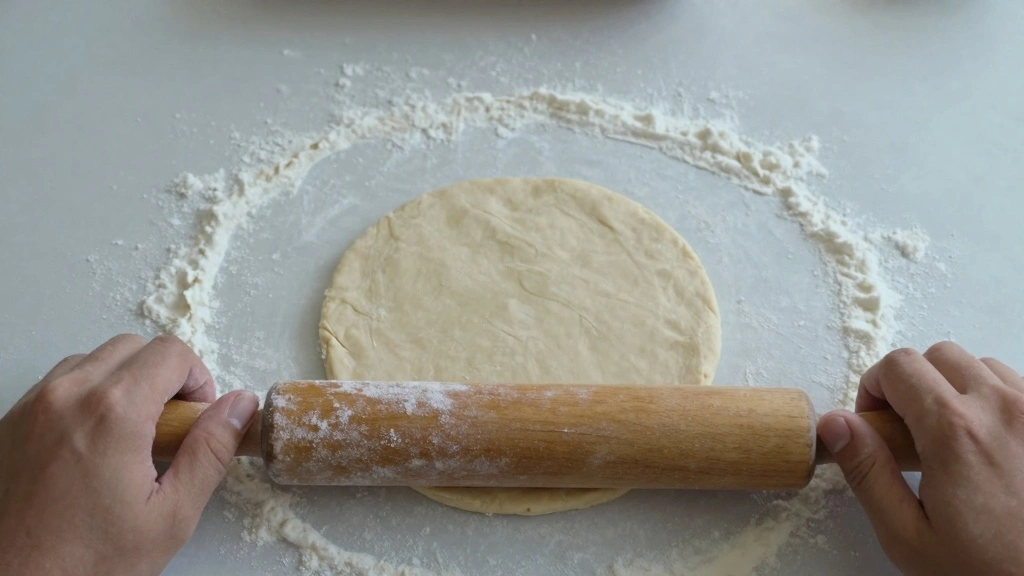
Once the dough has risen, punch it down gently to release air.
Roll it out on a floured surface into a 12x18 inch rectangle.
Keep the thickness even throughout.
Use a rolling pin to ensure uniform thickness.
Step 5: Add the Filling
Brush the melted butter over the entire surface of the dough.
Sprinkle the sugar and spice mixture evenly on top.
Ensure all areas are covered with filling.
Press down gently to adhere the filling to the dough.
Step 6: Shape the Rolls
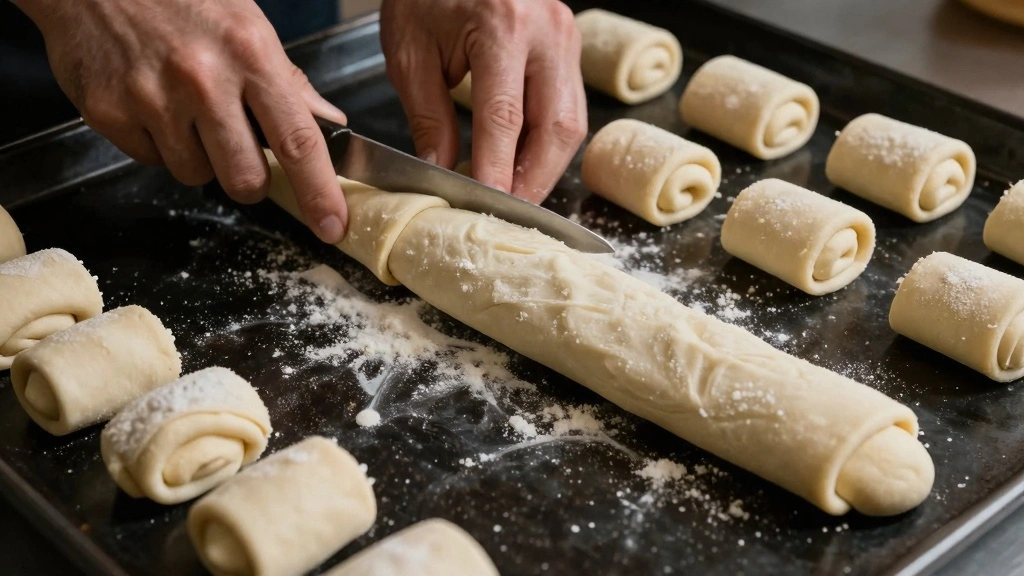
Starting from the long edge, roll the dough tightly into a log.
Use a sharp knife to cut into 12 equal pieces.
Arrange the rolls on a lined baking sheet.
Leave some space between each roll for expansion.


Step 7: Bake the Rolls
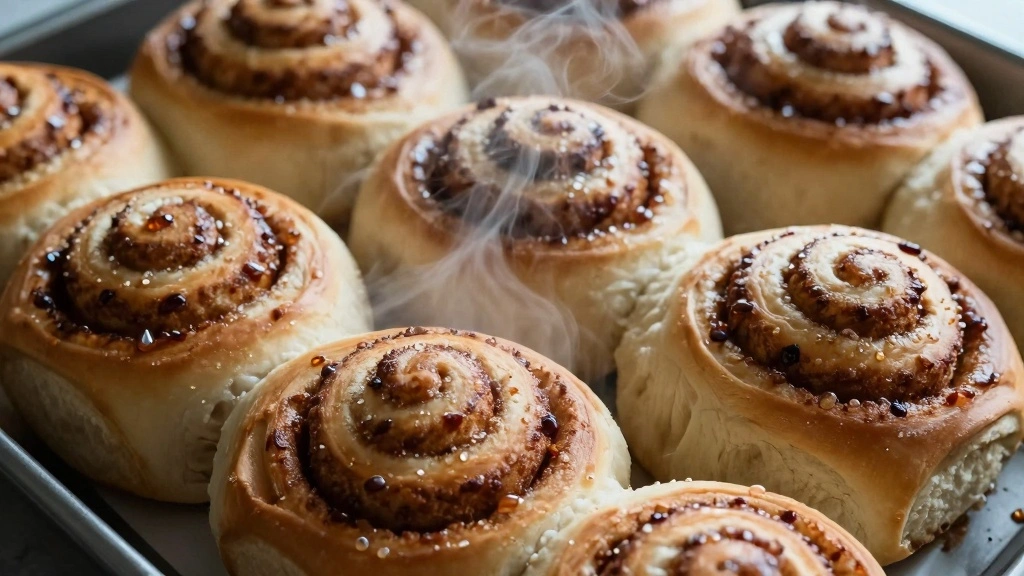
Preheat the oven to 350°F (175°C).
Bake the rolls for 20-25 minutes until golden brown.
Check for doneness by tapping the top for a hollow sound.
Avoid overbaking to prevent dryness.
Step 8: Prepare the Glaze and Serve
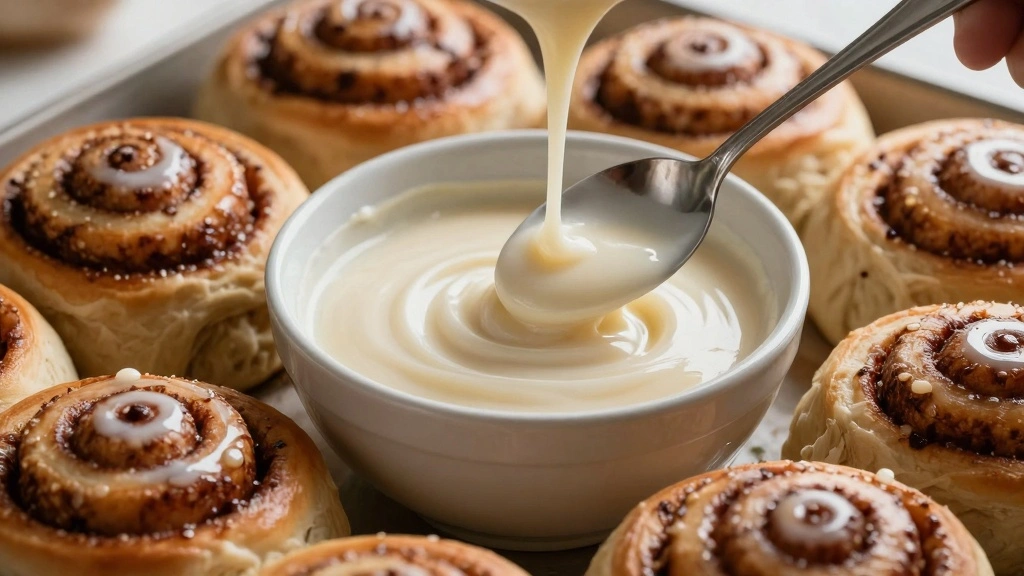
In a bowl, whisk powdered sugar, milk, and vanilla extract until smooth.
Drizzle the glaze over warm rolls.
Let the glaze set slightly before serving.
Ensure the glaze is the desired consistency by adjusting milk quantity.


Critical Timing and Temperature Guide
Dough Rising: Let the dough rise for at least 1 hour in a warm place, ensuring it doubles in size. Avoid letting it rise too long, which can lead to overproofing and a sour taste.
Baking: Bake at 350°F (175°C) for 20-25 minutes. Look for a golden brown color and a slight hollow sound when tapped. Avoid opening the oven door frequently, which can cause uneven baking.
Glazing: Allow rolls to cool for about 10 minutes before glazing. This prevents the glaze from melting off completely. Adjust the glaze consistency to ensure it coats well without being too runny.
Pro Tips for Pumpkin Shaped Cinnamon
• Ingredient Selection: Use high-quality cinnamon and fresh nutmeg for the best flavor. These spices are the backbone of the rolls' taste.
• Preparation Secret: Allow the dough to rest for a few minutes after kneading to relax the gluten, making it easier to roll out.
• Temperature Management: Ensure all ingredients are at room temperature for even mixing and rising.
• Texture Enhancement: Brush the rolls with butter before baking to achieve a soft, tender crust.
• Flavor Layering: Add a pinch of cardamom to the filling for an extra layer of flavor that complements the cinnamon.
• Make-Ahead Strategies: Prepare the dough a day in advance and refrigerate overnight. This enhances the flavor and makes morning preparation faster.
• Restaurant-Quality Finishing Touches: Sprinkle a touch of sea salt over the glaze for a contrasting flavor that enhances sweetness.
• Equipment Optimization: Use parchment paper on baking sheets to prevent sticking and ensure easy cleanup.


Troubleshooting Common Issues
• Dense Texture: This can be caused by over-kneading, under-kneading, or not allowing enough time for the dough to rise. Ensure proper kneading and rising times.
• Uneven Baking: If the rolls are browning unevenly, check if your oven temperature is accurate and rotate the baking sheet halfway through baking.
• Filling Leakage: If the filling leaks out during baking, ensure the dough is rolled tightly and the ends are pinched closed.
• Flat Rolls: This can occur if the dough was not rolled tightly enough or if the yeast was expired. Ensure fresh yeast and tight rolling.
• Glaze Too Runny: Adjust the amount of powdered sugar for a thicker glaze or add more milk for a thinner consistency.
Variations and Regional Differences
• Swedish Style: Uses cardamom in the dough and pearl sugar on top instead of glaze, focusing on a less sweet, more spiced experience.
• American Classic: Often includes cream cheese frosting instead of a simple glaze, adding a tangy richness to the rolls.
• French Brioche: Incorporates more eggs and butter for a richer, more tender dough, with a subtle sweetness and a buttery finish.
• Vegan Version: Replaces dairy milk with almond or oat milk and uses coconut oil instead of butter, making it suitable for plant-based diets.


Food Science Behind the Recipe
• Yeast Fermentation: Yeast consumes sugars in the dough, producing carbon dioxide and ethanol, which cause the dough to rise and develop flavor.
• Maillard Reaction: The browning of the rolls during baking is due to the Maillard reaction, which enhances flavor and color.
• Gluten Development: Kneading the dough aligns gluten strands, providing the structure necessary for trapping gas bubbles and giving the rolls their chewy texture.
Frequently Asked Questions
What's the most common mistake people make when preparing Pumpkin Shaped Cinnamon Rolls? Overproofing the dough, which can lead to a sour taste and dense texture. Always keep an eye on the dough to ensure it doesn't rise too much.
Can I use a different type of flour? While all-purpose flour is recommended, bread flour can provide a chewier texture, but avoid using cake flour as it lacks the necessary gluten.
How do I store leftover rolls? Store in an airtight container at room temperature for up to 3 days, or freeze for up to a month for longer storage.
Is it possible to make these rolls without a stand mixer? Yes, you can knead the dough by hand, but it will require more effort and time to achieve the right consistency.
Why is my glaze too thick or too thin? Adjust the amount of milk or powdered sugar until you reach the desired consistency. Start with small adjustments.
Can I add nuts or raisins to the filling? Absolutely! Chopped nuts or raisins can add texture and flavor to the filling. Just be sure to distribute them evenly.
What if my rolls don't rise properly? Check if the yeast is fresh and active. Also, ensure that the dough is kept in a warm enough environment to rise.
Serving and Presentation Guide
• Traditional Presentation: Serve the rolls warm on a rustic wooden platter, drizzled with glaze, and garnished with small pumpkin decorations for an autumnal touch.
• Brunch Buffet: Arrange rolls on a tiered cake stand alongside seasonal fruits and a pot of hot coffee or tea for a cozy brunch setting.
• Gift Presentation: Place rolls in a decorative box lined with parchment paper for a thoughtful homemade gift.
• Elegant Dessert: Serve with a scoop of vanilla ice cream and a sprinkle of cinnamon for a sophisticated dessert option.
Conclusion
These Pumpkin Shaped Cinnamon Rolls are a delightful way to embrace the flavors and spirit of fall.
With their charming appearance and irresistible taste, they're sure to become a favorite in your seasonal baking repertoire.
I hope you enjoy making and sharing these rolls as much as I do.
Happy baking and enjoy the cozy warmth of autumn in every bite!