


Easy No Bake Cheesecake Recipe Smooth and Creamy
1.5 cups graham cracker crumbs
0.5 cup unsalted butter
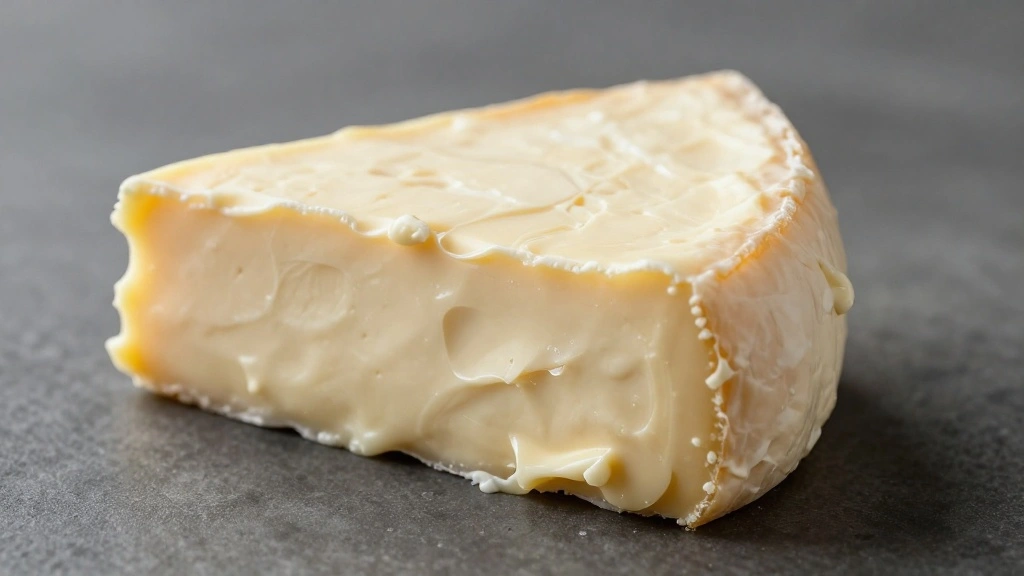
16 oz cream cheese
1 cup powdered sugar
1 teaspoon vanilla extract
1 cup heavy cream
PT240M
8 servings
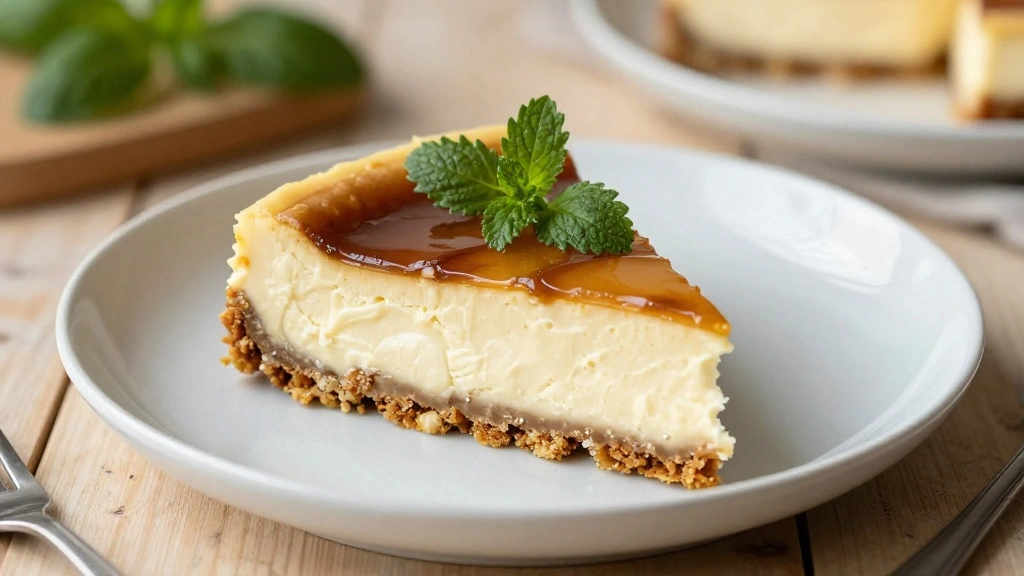
On a warm summer afternoon, there’s nothing quite as delightful as a smooth and creamy no bake cheesecake.
This dessert encapsulates the essence of ease and indulgence, with its velvety texture and rich flavor profile appealing to all ages.
I first encountered this recipe during my childhood when my grandmother would whip it up for family gatherings.
Its refreshing taste and hassle-free preparation make it a staple for celebrations and casual dinners alike.
Whether you’re a seasoned baker or a novice in the kitchen, this no bake cheesecake promises to deliver a decadent treat without the need for an oven.
The History and Cultural Significance
• No Bake Cheesecake traces its origins to ancient Greece, where it was originally created by Greek athletes as a source of energy.
• The dish evolved over decades as cream cheese became a popular ingredient in the 19th century, eventually becoming the beloved version we know today.
• In America, this dish traditionally appears at summer picnics and Fourth of July celebrations, symbolizing indulgence and festivity.
• While many variations exist across different regions, the authentic version maintains a rich and creamy texture that sets it apart from imitations.
Recipe Overview
Nutritional Information (per serving)
Essential Equipment Guide
Springform Pan: A springform pan is crucial for easy release of the cheesecake, preserving its shape and texture. Alternatives like pie dishes work but may not offer the same ease of removal.
Electric Mixer: An electric mixer ensures that all ingredients are thoroughly combined, preventing lumps for a smoother texture. A hand whisk can work, but it requires more effort and time.
Spatula: A spatula helps to evenly spread the cheesecake mixture and create a smooth top. Look for one with a flexible head to reach every corner of the pan.


Ingredients
For the Base
| Amount | Ingredient | Notes |
|---|---|---|
| 1.5 cups | graham cracker crumbs | provides a crunchy base |
| 0.5 cup | unsalted butter | melted, binds the crumbs together |
For the Filling
| Amount | Ingredient | Notes |
|---|---|---|
| 16 oz | cream cheese | softened, primary source of creaminess |
| 1 cup | powdered sugar | sweetens the filling |
| 1 teaspoon | vanilla extract | enhances flavor |
| 1 cup | heavy cream | whipped, adds lightness to the texture |


Preparation Methods
Whipping Cream: Properly whipping cream is essential for achieving the light, airy quality of the cheesecake filling. Ensure the cream is cold and use a chilled bowl and beaters for optimal results.
Folding: Folding the whipped cream into the cream cheese mixture requires a gentle touch to maintain the airiness of the filling. Use a spatula to lift and fold without deflating the mixture.
Chilling: Chilling the cheesecake allows the flavors to meld and the filling to set. Patience is key; a minimum of 4 hours is recommended for the best texture.


Step 1: Prepare the Base
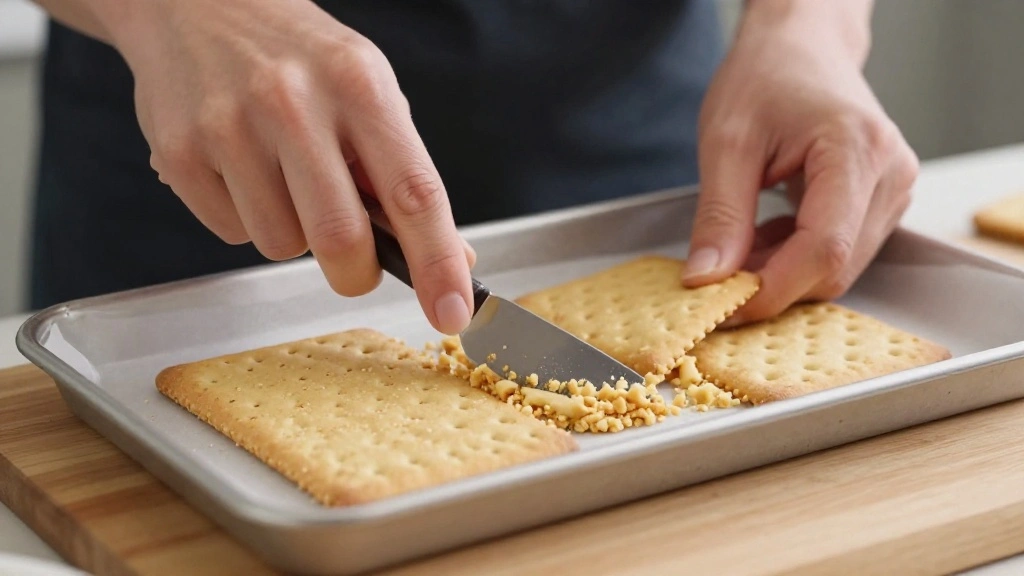
Combine graham cracker crumbs with melted butter in a bowl.
Mix until the crumbs are evenly coated with butter.
Press the mixture firmly into the bottom of a springform pan.
Ensure the layer is even for a stable base.
Step 2: Soften Cream Cheese
Allow cream cheese to reach room temperature.
This ensures it mixes smoothly with other ingredients.
Avoid microwaving, as it can change the texture.
Check by pressing gently with a finger; it should yield easily.
Step 3: Whip Heavy Cream
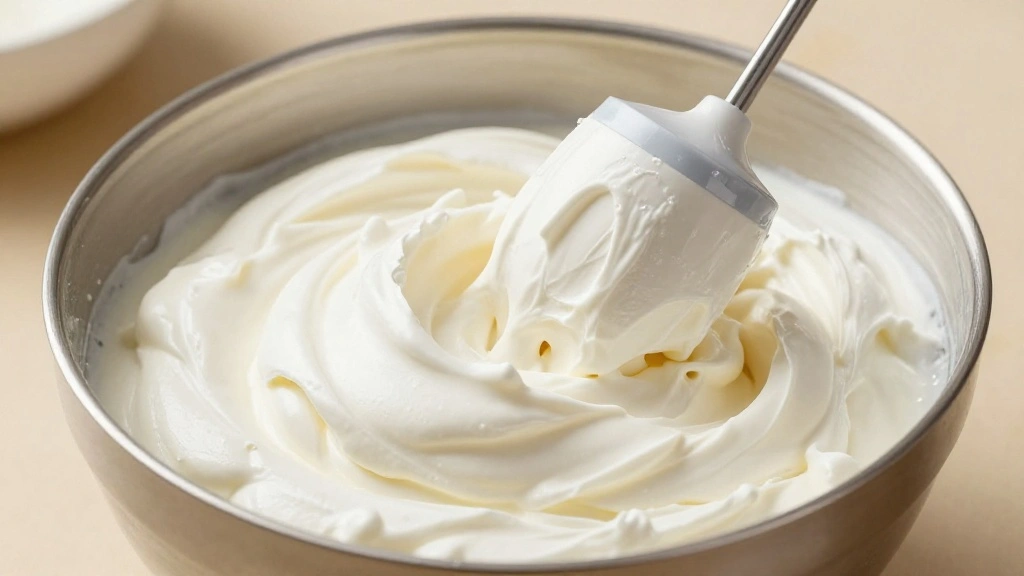
Pour cold heavy cream into a chilled mixing bowl.
Use an electric mixer on medium-high speed to whip.
Stop when stiff peaks form in the cream.
Be cautious not to overwhip, which can turn it into butter.
Step 4: Combine Cream Cheese and Sugar
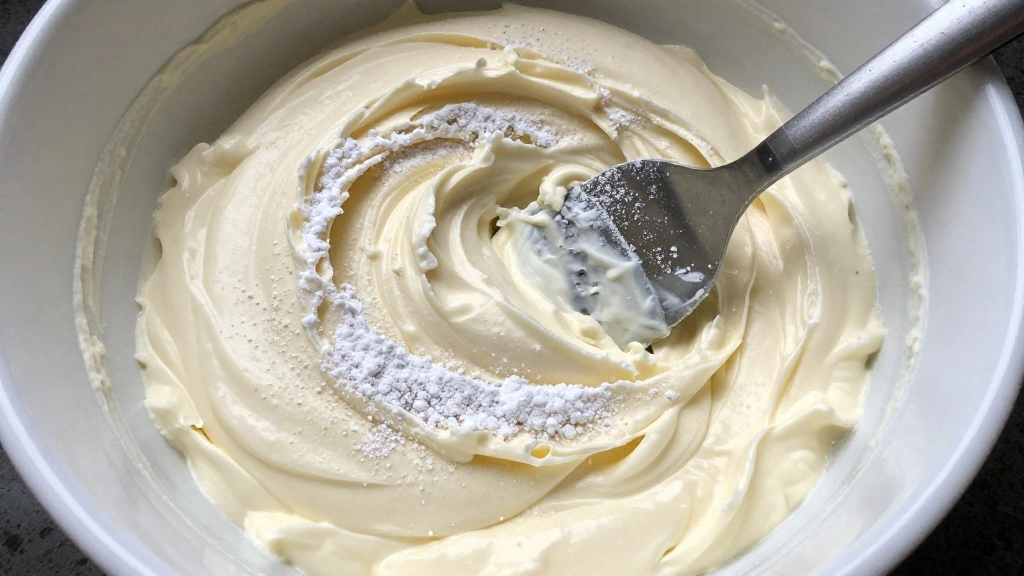
In a separate bowl, beat softened cream cheese until smooth.
Gradually add powdered sugar and vanilla extract while mixing.
Mix until the sugar is fully incorporated and the mixture is creamy.
Scrape the sides of the bowl to ensure even mixing.
Step 5: Fold in Whipped Cream
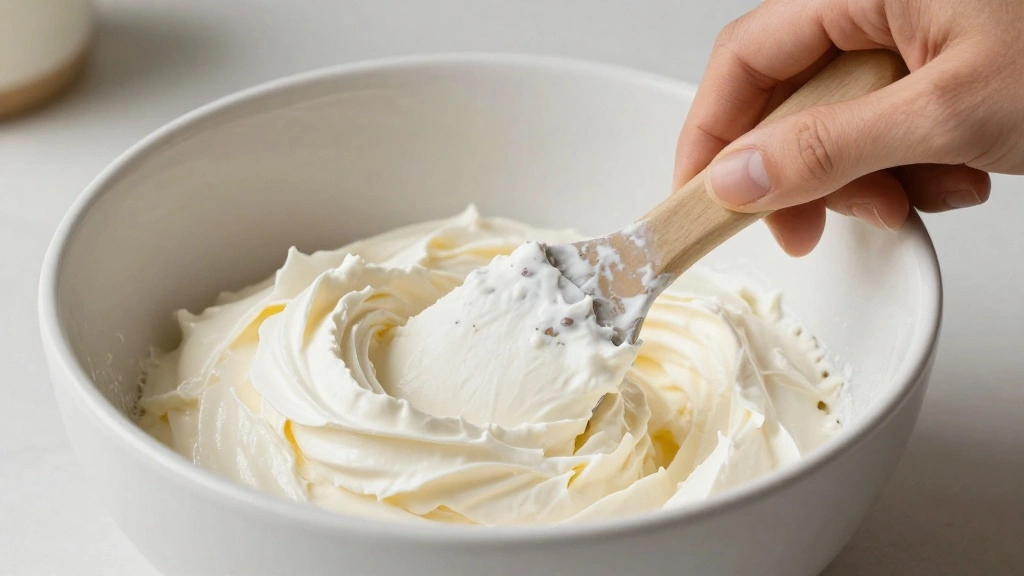
Gently fold the whipped cream into the cream cheese mixture.
Use a spatula to lift and fold the mixture to preserve airiness.
Continue until the whipped cream is fully incorporated.
Avoid overmixing to maintain a light texture.
Step 6: Spread Filling Over Base
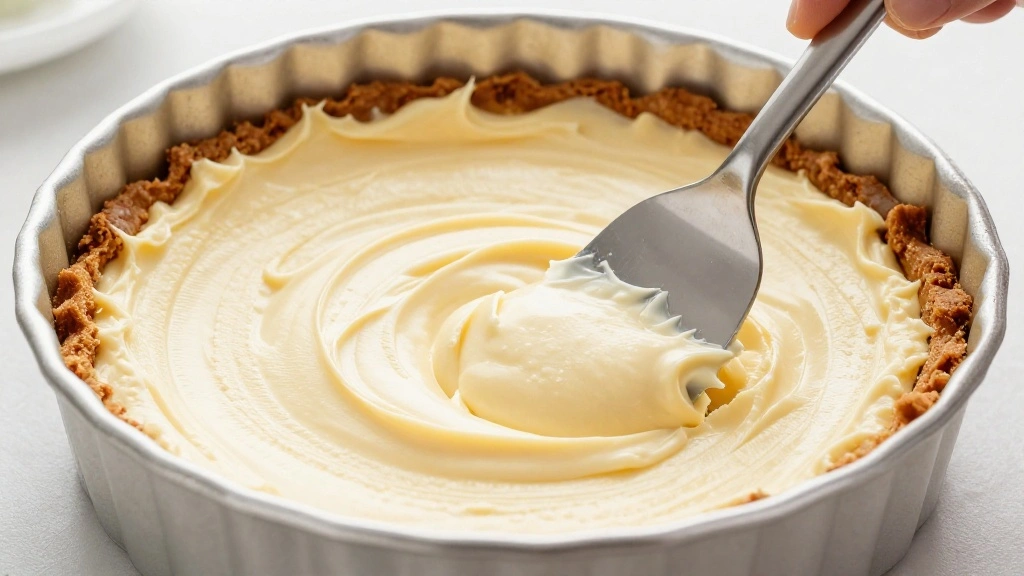
Pour the cream cheese mixture over the prepared crust.
Use a spatula to spread it evenly across the surface.
Smooth the top for a neat presentation.
Ensure the filling reaches the edges of the pan.
Step 7: Chill the Cheesecake

Cover the cheesecake with plastic wrap or a lid.
Place it in the refrigerator to chill for at least 4 hours.
This allows the flavors to meld and the filling to set.
Check for firmness before serving.
Step 8: Serve and Enjoy
Carefully remove the sides of the springform pan.
Slice the cheesecake with a sharp, thin knife.
Clean the knife between each cut for neat slices.
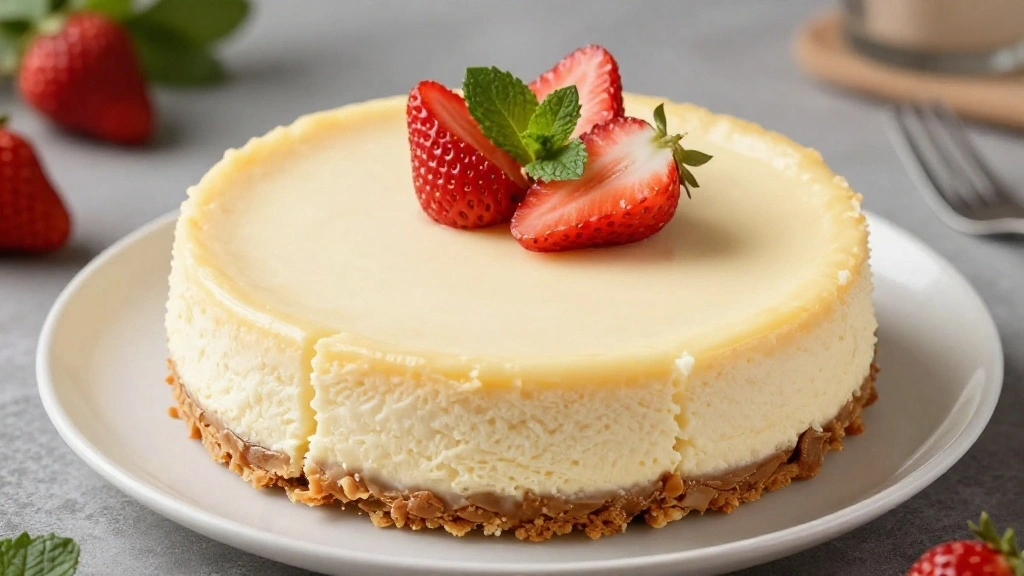
Serve chilled, optionally garnished with fresh fruit or sauces.


Critical Timing and Temperature Guide
Whipping Cream: Whip at medium-high speed until stiff peaks form, about 3-5 minutes. Peaks should stand upright without collapsing; avoid overwhipping.
Chilling: Chill the cheesecake for at least 4 hours or overnight for best results. The filling should be firm and hold its shape when sliced.
Serving Temperature: Serve the cheesecake chilled directly from the refrigerator for optimal texture and taste. Allowing it to warm too much can cause it to lose firmness.
Pro Tips for No Bake Cheesecake
• Ingredient Selection: Choose full-fat cream cheese for a richer texture and flavor; low-fat versions can result in a watery filling.
• Preparation Secret: Adding a pinch of salt to the filling can enhance the sweetness and flavor depth.
• Temperature Management: Ensure cream cheese is completely softened to prevent lumps in the filling.
• Texture Enhancement: Fold ingredients gently to maintain the light, airy texture that defines a great no bake cheesecake.
• Flavor Layering: Incorporate citrus zest into the filling for a bright, refreshing note that complements the creamy base.
• Make-Ahead Strategies: Prepare the cheesecake a day in advance and store in the refrigerator to allow flavors to fully develop.
• Restaurant-Quality Finishing Touches: Top with a glossy fruit glaze or fresh berries for an elegant presentation.
• Equipment Optimization: Use a springform pan to easily release the cheesecake without damaging its delicate structure.


Troubleshooting Common Issues
• Texture Too Dense: This can occur if the cream cheese isn’t softened or if the whipped cream is overmixed. Ensure proper softening and fold gently.
• Crust Falling Apart: If the crust is too crumbly, increase the amount of butter or press it more firmly into the pan.
• Filling Not Setting: Ensure the cheesecake chills long enough; overnight is ideal. If using gelatin, ensure it’s properly dissolved.
• Flavors Unbalanced: A lack of acidity can make the cheesecake too sweet. Consider adding a bit more lemon juice or zest.
• Cracked Surface: This can happen if the cheesecake is moved too quickly from the fridge to room temperature. Ensure a gradual temperature change.
Variations and Regional Differences
• Italian Style: Incorporates ricotta cheese instead of cream cheese for a lighter, slightly grainy texture and includes citrus zest for flavor.
• Japanese Style: Known for its jiggly texture, this version uses a blend of cream cheese, sugar, and eggs, often including a hint of matcha.
• New York Style: Typically baked, this version is denser and often includes a touch of sour cream for tanginess.
• French Style: Known as ‘fromage blanc,’ this variant often includes gelatin for setting and is lighter, served with a fruit coulis.


Food Science Behind the Recipe
• Emulsification: The process by which the cream cheese and whipped cream combine to create a stable mixture, essential for the cheesecake’s creamy texture.
• Gelation: Although this recipe doesn’t use gelatin, understanding its role can help with variations that require setting agents.
• Aeration: Whipping the cream incorporates air, which lightens the texture of the cheesecake, making it less dense and more palatable.
Frequently Asked Questions
What’s the most common mistake people make when preparing no bake cheesecake? Overmixing the ingredients, which can lead to a dense texture.
Can I substitute cream cheese with a lower-fat version? While possible, it may result in a less creamy texture and affect the overall richness.
How do I prevent the crust from crumbling? Ensure the crust is firmly pressed into the pan and allow it to chill before adding the filling.
Is it necessary to use a springform pan? It’s highly recommended for easy release, but a deep pie dish can work in a pinch.
How long can the cheesecake be stored? It can be kept in the refrigerator for up to 4-5 days if covered properly.
Can I freeze no bake cheesecake? Yes, wrap it well and freeze for up to 3 months. Thaw in the refrigerator before serving.
Why is my cheesecake not setting? Ensure it chills for the recommended time and consider using gelatin if needed for additional setting.
Serving and Presentation Guide
• Traditional Presentation: Serve on a flat white platter to highlight the cheesecake’s clean lines and top with an assortment of fresh berries for color contrast.
• Individual Servings: Use small ramekins to create personal-sized cheesecakes, ideal for portion control and easy serving.
• Layered Parfait Style: Create layers of crumb, cheesecake filling, and fruit in clear glasses for a modern take.
• Elegant Buffet Display: Arrange slices on a tiered dessert stand, garnished with mint leaves and edible flowers for a festive touch.
Conclusion
Creating a no bake cheesecake is both an art and a science, requiring attention to detail yet allowing for creative expression.
With its creamy texture and delightful flavor, this dessert is sure to impress both family and friends.
So why wait? Gather your ingredients, follow these steps, and enjoy the satisfaction of making a stunning no bake cheesecake that looks as good as it tastes.